
Car Audio Installation Tips for High Power Systems: Wiring, Speakers, Amplifiers and Tuning
A good car audio installation starts before the first cable gets run. Plan where the amplifiers, DSP, speakers, subwoofers and battery bank will go, work out the electrical demand, then build the system so every component has the power, signal and installation it needs to perform properly.
For high power car audio, the electrical foundation matters just as much as the equipment. A big monoblock running through undersized cable, a weak ground or excessive voltage drop will never deliver what it should. At the other end, a huge lithium bank will not fix poor speaker mounting, a bad enclosure, clipping or crossover settings that do not suit the system.
The right order is straightforward: plan the system, build the power path, mount everything properly, verify the signal chain, then tune it. This guide concentrates on that installation process rather than repeating the battery, alternator, enclosure and tuning subjects covered in Evolution Lithium’s dedicated technical guides.
Car Audio Installation Tips That Matter Most
- Plan the complete layout before buying cable or cutting panels.
- Match the final speaker and subwoofer impedance to the amplifier.
- Use continuous RMS specifications rather than peak wattage.
- Size power cable around current demand and cable length.
- Fuse the electrical circuit correctly.
- Give the ground path the same attention as the positive cable.
- Protect wiring wherever it passes through metal or near moving parts.
- Mount speakers onto a rigid, sealed foundation.
- Build the subwoofer enclosure for the exact driver.
- Keep amplifiers secure and ventilated.
- Set gain from a known clean signal rather than using it as a volume control.
- Set crossover, delay and EQ around your actual vehicle and speakers.
- Measure amplifier voltage under load before blaming the battery or alternator.
- Test the system in stages before putting every trim panel back.
1. Plan the Entire System Before Installing Anything
Draw a simple system map before removing trim.
| System Area | Decide Before Installation |
|---|---|
| Source | Factory or aftermarket head unit, signal type and integration |
| DSP | Inputs, outputs and channel allocation |
| Amplifiers | Location, impedance, current demand and ventilation |
| Front stage | Speaker position, mounting depth and crossover arrangement |
| Subwoofer | Driver wiring, enclosure and available boot space |
| Electrical | Alternator, battery bank, cable routes, fuses and grounds |
Check physical clearance before buying parts. Lower the windows completely before measuring door speaker depth. Check seat movement, amplifier clearance, boot access and where heavy power cable can safely pass through the vehicle.
If you are still deciding what components the build should contain, start with our complete guide to planning a car audio system in New Zealand. This page is deliberately focused on installing the equipment correctly once the system has been chosen.
2. Match Amplifier RMS and Speaker Impedance Before Wiring
Confirm the amplifier is stable into the final nominal load presented by the speakers or subwoofers.
This matters most with dual voice coil subs, multiple woofers, bridged channels or several speakers sharing one amplifier channel. Changing the wiring arrangement can change the load the amplifier sees considerably.
Do not choose the lowest possible impedance simply because it produces the biggest amplifier power number.
Use the manufacturer’s rated operating range and continuous RMS specifications. If you need the full explanation first, read our guide to RMS amplifier power, speaker ratings and impedance.
3. Have the Right Installation Tools Ready
You do not need a full car audio workshop for a sensible DIY install, but decent electrical tools quickly pay for themselves.
- Digital multimeter
- Trim removal tools
- Cable cutters
- Wire strippers
- Correct lug and terminal crimpers
- Heat shrink
- Socket and spanner set
- Drill and drill bits
- Grommets or bulkhead cable fittings
- Cable clips and ties
- Test tones
- Oscilloscope or distortion detector for accurate amplifier setup
- Torque tools where manufacturers provide terminal torque specifications
High current connections deserve particular attention. A loose or poor crimp can add resistance to a circuit carrying hundreds of amps.
4. Work Safely Around the Vehicle
Follow the vehicle manufacturer’s isolation procedure before altering the main electrical system. Modern vehicles can contain airbags, battery current sensors, computer controlled charging and modules that may require a specific shutdown or reconnection process.
Do not drill through a panel until you know what is behind it. Factory wiring, fuel lines, brake lines, airbags and control modules can all be hidden from view.
For NZ vehicles, the current NZTA vehicle modification requirements should be checked if the installation involves substantial changes. NZTA’s inspection guidance specifically allows normal stereo and speaker modifications without LVV certification where material removal is minimal and the structure has not been weakened, particularly around seatbelt mountings.
5. Size Power Cable Around Current and Cable Length
There is no universal car amplifier power cable size.
The correct conductor depends on:
- Expected current
- Cable length
- Conductor material
- Allowable voltage drop
- Insulation rating
- Installation environment
- Fuse protection
That is why advice such as “4 AWG is enough for a high power amplifier” does not hold up. A modest four-channel amplifier and a large monoblock can have completely different current demands.
JL Audio’s manufacturer guidance for choosing amplifier power wire size likewise bases conductor selection on amplifier current draw and cable length rather than one universal gauge.
For the main high current path in an Evolution Lithium build, quality OFC cable is preferred. For the lithium-specific side of the installation, use our SCiB LTO wiring guide for high current car audio systems.
6. Fuse the Power Circuit Properly
The main fuse exists primarily to protect the electrical circuit from excessive fault current.
Littelfuse automotive cable fuse guidance describes these products as overcurrent protection for vehicle wiring, which is the right way to approach main car audio fusing.
The fuse, conductor and expected circuit current need to be compatible. Do not choose a fuse simply by converting amplifier watts into a convenient number.
Keep the unprotected positive cable from the source as short as practical and follow the fuse holder, conductor and equipment manufacturer’s requirements.
7. Treat the Ground Path Like a Power Cable
A huge positive cable does not help much if the return path is poor.
Where a chassis ground is appropriate:
- Use a solid structural point.
- Expose clean metal at the contact surface.
- Use a proper lug and hardware.
- Secure the connection mechanically.
- Protect it from corrosion where necessary.
- Check voltage drop under load.
Remember that amplifier ground is only part of the return path. Engine, chassis and battery negative connections can also restrict a high current system.
Our dedicated car audio grounding guide for high current amplifier systems covers the full process without repeating it here.
8. Protect Every Cable From Heat, Metal and Movement
Any heavy cable passing through sheet metal needs a proper grommet, gland or bulkhead fitting.
Secure long runs so vibration cannot slowly work the insulation against the vehicle.
Keep wiring clear of:
- Exhaust heat
- Seat rails
- Pedals
- Steering components
- Sharp brackets
- Hinges
- Moving suspension
- Areas where luggage can crush or cut the cable
The cable can be electrically oversized and still become dangerous if its insulation gets damaged.
9. Route Signal Wiring Properly
Plan RCA, balanced analogue, digital, speaker-level and remote wiring instead of bundling every cable together because it reaches the same amplifier rack.
Keep low-level signal cables away from major current paths and electrically noisy factory circuits where practical.
But do not assume the old “RCA one side, power the other” rule automatically fixes every noise problem. Alternator whine can come from grounding, source equipment, damaged signal cables, factory integration or several other faults.
If you end up chasing noise, intermittent sound or protection faults, use our step by step car audio troubleshooting guide instead of adding random filters.
10. Give Door Speakers a Solid Mounting Surface
Good speakers can sound average when they are screwed into a flimsy factory adapter.
Before mounting a door speaker:
- Check cutout diameter.
- Check mounting depth.
- Lower the window fully and check magnet clearance.
- Use a rigid mounting adapter.
- Seal the speaker to the mounting surface.
- Protect moisture-sensitive mounting material.
- Keep wiring clear of the glass and regulator.
- Keep factory drainage functional.
- Test everything before reinstalling the trim panel.
Keep speaker polarity consistent across the system unless a deliberate polarity change is made during acoustic tuning.
11. Use Sound Treatment for the Problem You Actually Have
Sound treatment is useful, but different materials perform different jobs.
Constrained-layer damping is used to control resonating metal panels. Closed-cell foam is useful for decoupling trim and reducing contact-point buzz. Other barrier products deal with different forms of noise transmission.
Dynamat’s explanation of car audio door damping and panel resonance similarly distinguishes structural vibration control from other forms of cabin treatment.
For most speaker installs, start with the panels that actually resonate and the area supporting the speaker rather than adding material everywhere simply because you can.
12. Build the Subwoofer Enclosure for the Actual Driver
There is no universal enclosure volume for a 10, 12 or 15 inch subwoofer.
Check the exact woofer’s:
- Recommended sealed volume
- Recommended ported volume
- Driver displacement
- Required net airspace
- Port area
- Port length
- Target tuning
- Power handling
KICKER’s subwoofer enclosure design guidance likewise uses driver and enclosure-specific requirements rather than a generic box size based solely on cone diameter.
If you are designing the enclosure from scratch, move to our dedicated custom ported and sealed subwoofer enclosure guide.
Once built, secure the box properly. A large enclosure loaded with heavy subwoofers should not be able to move through the boot under emergency braking or impact.
13. Mount Amplifiers Securely and Give Them Air
Mount amplifiers on a solid surface where they are protected but can still get rid of heat.
Avoid positions where the amplifier can be:
- Wet
- Buried under carpet
- Hit by luggage
- Crushed by a moving seat
- Exposed to excessive heat
Large bass systems can keep a monoblock under serious thermal load during long demos. Do not build a sealed amp rack purely because it looks tidy.
Support heavy cable as well. Large OFC runs should not hang their full weight from an amplifier terminal.
14. Integrate the Head Unit or Factory Audio System Correctly
An aftermarket head unit can be simple when a vehicle-specific loom and dash kit are available.
Factory systems can be far more involved. The factory source may interact with:
- Steering wheel controls
- Cameras
- Parking sensors
- Warning tones
- Vehicle settings
- Factory amplifiers
- CAN communication
- Active noise cancellation
Factory audio may also contain its own EQ, filtering, delay or volume-dependent processing.
On those vehicles, tapping the first convenient speaker wire is not necessarily the best way to feed an aftermarket amplifier. A suitable integration interface or DSP can preserve the functions the vehicle needs while providing a better signal path.
15. Set Amplifier Gain From a Clean Source Signal
Gain is not a volume control.
It matches amplifier input sensitivity to the signal feeding it.
A sensible setup sequence is:
- Turn off unnecessary EQ boosts and loudness processing.
- Find the maximum clean output of the source unit.
- Set the DSP or signal processor so that stage remains clean.
- Use a suitable test signal.
- Increase amplifier gain until the required clean output is reached.
- Reduce the setting if clipping is detected.
AudioControl’s amplifier technical guidance on gain and clipping identifies excessive gain or source level as common routes to clipping.
An oscilloscope or distortion detector gives you a far better reference than turning gain up until the system “sounds loud enough.”
16. Set Crossovers for Your Speakers, Not Somebody Else’s Car
A high-pass filter stops door speakers being asked to reproduce bass they cannot handle cleanly. A low-pass filter limits the subwoofer’s upper operating range.
The correct crossover depends on:
- Speaker capability
- Speaker installation
- Available amplifier power
- Crossover slope
- Subwoofer response
- Cabin response
- How adjacent drivers sum acoustically
About 80 Hz can be a useful starting region for some front-stage and subwoofer combinations, but it is not a universal setting.
Audiofrog’s technical explanation of choosing crossovers from speaker and acoustic response explains why the result at the listener matters more than simply copying a frequency from another installation.
17. Use DSP Time Alignment for Real Path-Length Differences
You do not sit the same distance from every speaker in the car.
The closest driver reaches you earlier than one mounted farther away. DSP delay lets you compensate for those path-length differences.
A sensible baseline is to measure from the listening position to each driver, enter the corresponding distances or delays into the processor, then refine the result acoustically.
Audiofrog’s technical guide to DSP time alignment and speaker path length covers the underlying principle in more detail.
18. Use EQ After the Installation Is Right
EQ should not be used to cover up an installation problem.
If a door rattles, fix the door. If a speaker is wired incorrectly, fix the wiring. If the amplifier is clipping, fix the gain structure. If voltage is dropping, fix the electrical system.
Once those basics are right, EQ can deal with the remaining response at the listening position.
Be careful with large boosts. They consume amplifier headroom quickly and can push a speaker or amplifier towards its limits.
19. Measure Amplifier Voltage Under Load
For a high power build, check the electrical system while it is actually working.
Useful measurement points include:
- Alternator output
- Front electrical system
- Rear lithium bank
- Distribution blocks
- Amplifier terminals
If the voltage differs substantially between two parts of the circuit while high current is flowing, investigate the wiring, connections, fuse holders and ground path between those points.
Do not automatically buy another battery because the voltage displayed at the amplifier is low.
Use our guide to finding and fixing voltage drop in car audio systems for the complete diagnostic procedure.
20. High Power Car Audio Needs the Charging System to Match
Once amplifier demand climbs, the charging system is part of the audio build.
You need the right combination of:
- Alternator output
- Charging voltage
- Battery capacity
- Battery discharge capability
- Power cable
- Fusing
- Grounding
A lithium bank can support short high-current demand, but the alternator still has to replace the energy being used during extended play.
Use the Evolution Lithium car audio battery and alternator calculator as a starting point for matching the electrical system to amplifier demand.
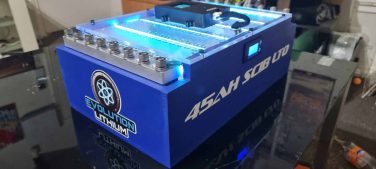
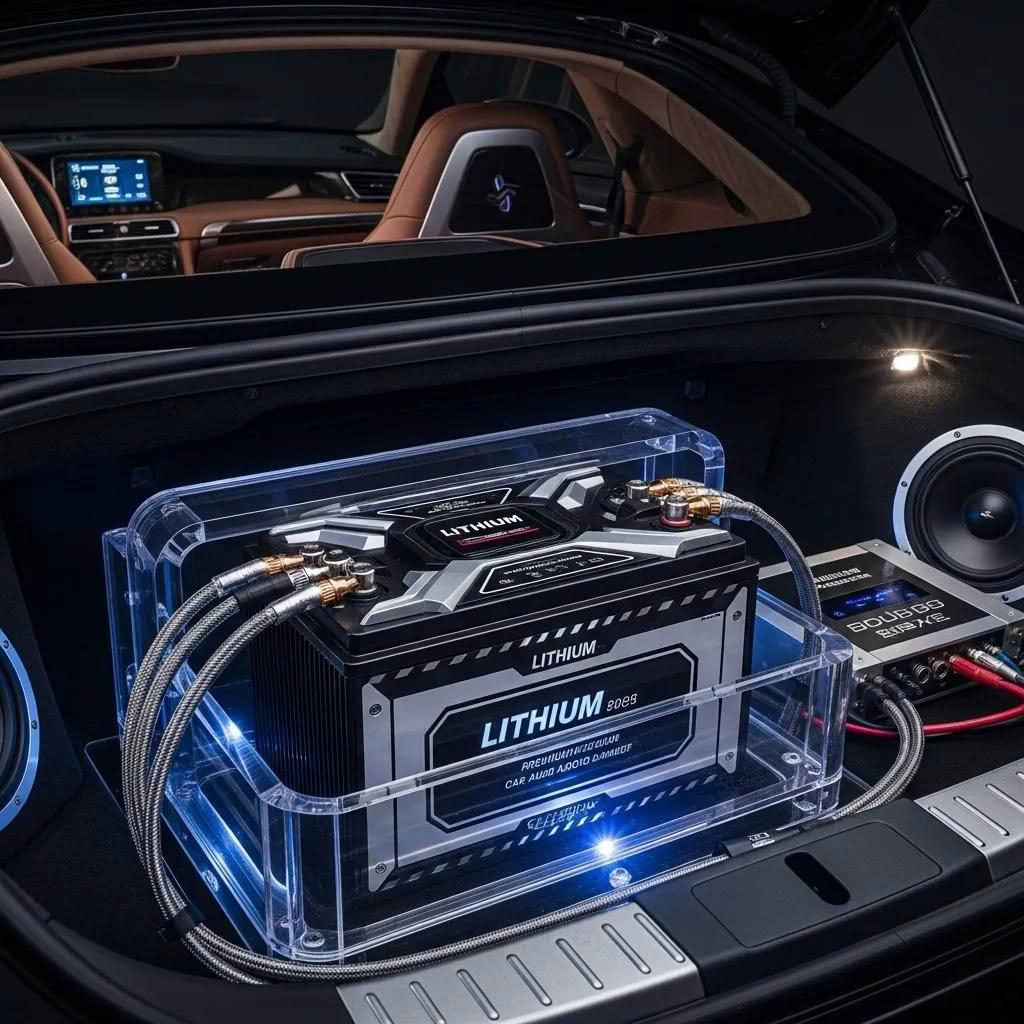
Evolution Lithium banks should be securely installed in an appropriate boot or rear-cabin location rather than under the bonnet. Protect the power circuit correctly and use an active balancer where the battery configuration requires balancing support.
For the battery-specific installation process, see our lithium battery installation guide for car audio systems.
21. Test the Car Audio Installation in Stages
Do not finish every panel and cover before switching the system on for the first time.
| Stage | What to Check |
|---|---|
| Power | Polarity, continuity, fuses and supply voltage |
| Amplifiers | Remote turn-on, protection state, voltage and ground |
| Signal | Channel routing, DSP inputs/outputs and noise |
| Speakers | Polarity, channels, clearance and rattles |
| Subwoofer | Final impedance, polarity and enclosure clearance |
| Full load | Voltage drop, terminals, fuse holders and temperature |
If something fails, you then know which stage introduced the problem instead of pulling the entire car apart again.
Common Car Audio Installation Mistakes
- Buying equipment before planning the complete system
- Using peak wattage instead of RMS specifications
- Wiring below the amplifier’s minimum rated impedance
- Using power cable that is too small
- Choosing cable by outside diameter instead of conductor
- Leaving positive cable inadequately protected
- Passing cable through bare sheet metal
- Using weak or painted ground points
- Leaving heavy cable hanging from amplifier terminals
- Mounting speakers into flexible adapters
- Using a generic subwoofer box volume
- Treating amplifier gain as another volume control
- Copying crossover and DSP settings from another car
- Using EQ to hide mechanical or electrical problems
- Adding more battery without checking charging capacity and voltage drop
When Should You Use a Professional Car Audio Installer?
A straightforward speaker or amplifier install can be a reasonable DIY project when you understand the circuit and have the right tools.
Professional help becomes more sensible when the job involves:
- Complex factory amplified systems
- CAN integration
- Active noise cancellation
- Airbag or safety-related trim
- Hybrid or EV high-voltage systems
- Structural modifications
- Major fabrication
- Large charging-system changes
- High-current lithium systems outside your experience
- Complex multiway DSP tuning
There is nothing wrong with doing the parts you understand yourself and using a specialist for the parts where a mistake becomes expensive.
Conclusion: The Installation Decides How Well the Equipment Performs
You can buy excellent speakers, a massive monoblock, a good DSP and a capable lithium bank and still end up with an average system if the installation underneath them is poor.
Plan first. Match RMS and impedance correctly. Use enough copper. Fuse the circuit properly. Build a solid return path and protect every power cable from heat, metal and movement.
Give the audio side the same attention. Mount speakers properly, build the enclosure for the subwoofer you actually own, keep amplifiers cool and establish a clean signal before adjusting gain or EQ.
Finally, test the electrical system under load and tune the vehicle you built rather than copying somebody else’s settings.
The expensive part of most car audio builds is the equipment. The installation determines how much of that equipment you actually get to use.
Frequently Asked Questions
What size power cable should I use for a car amplifier?
Choose the conductor from the expected current draw, cable length, conductor material and acceptable voltage drop. There is no universal gauge for every amplifier. Large monoblocks and high power systems may require substantially more copper than a small four-channel amplifier.
Where should I ground a car amplifier?
Use a mechanically strong, low-resistance return path. Where chassis grounding is appropriate, use clean structural metal and a secure connection. Check the complete return path and verify voltage drop under load rather than assuming a ground is good because the amplifier powers up.
How close should a car audio fuse be to the battery?
Keep the unprotected positive conductor from the source as short as practical and follow the cable, fuse holder and equipment manufacturer’s requirements. The key purpose is to protect the circuit if the positive cable faults downstream.
Should power and RCA cables run on opposite sides of the car?
Separating low-level signal wiring from major current paths is sensible where practical, but opposite-side routing is not a guaranteed cure for noise. Poor grounding, source integration and damaged signal cables can still create alternator whine or interference.
What crossover frequency should I use for car speakers?
There is no universal setting. Choose the crossover around the speaker’s usable range, installation, available power, filter slope and the way it integrates acoustically with the other drivers. Around 80 Hz can be a useful starting point in some systems, not a fixed rule.
How should amplifier gain be set correctly?
Find the clean output limit of the source and any DSP first. Then use an appropriate test signal and preferably an oscilloscope or distortion detector to match amplifier input sensitivity without clipping. Gain is not an additional volume control.
Does sound deadening improve car audio?
Proper damping can reduce resonance in door skins and other flexible panels, giving speakers a more controlled mounting environment. Foam, damping material and barrier products perform different jobs, so use the material that addresses the actual problem.
Can I install a car audio system myself?
Yes, if the installation is within your electrical and mechanical ability and you have the appropriate tools. Complex factory integration, structural work, high-current lithium installations and advanced DSP systems may warrant professional help.
Where should a lithium battery bank be installed for car audio?
Evolution Lithium recommends installing high-current lithium banks securely in an appropriate boot or rear-cabin location rather than under the bonnet. Protect the positive wiring correctly, secure the bank against movement and use an active balancer where required by the cell configuration.
Why does my amplifier voltage drop even with a large lithium bank?
Check the whole power path. Cable resistance, terminals, fuse holders, grounds, alternator output, charging voltage and battery state of charge can all affect voltage at the amplifier. Diagnose the cause before adding more battery capacity.
What should I test before putting all the trim panels back?
Verify power polarity, fuse installation, charging voltage, amplifier turn-on, speaker polarity, channel routing, DSP inputs and outputs, subwoofer impedance and voltage under load. Run the system hard enough to reveal loose connections, noise or excessive heat before sealing the installation away.
If you are planning a high power electrical upgrade, use the Evolution Lithium battery and alternator calculator or browse our lithium car audio batteries, amplifiers and electrical hardware before finalising the build.