

Car Audio Battery Installation NZ: How to Install a Secondary Lithium Battery
Installing a secondary lithium battery for car audio is not simply a matter of connecting another battery to the vehicle. A reliable installation requires the battery location, power cable, grounding, fusing, alternator output and charging voltage to work together as one electrical system.
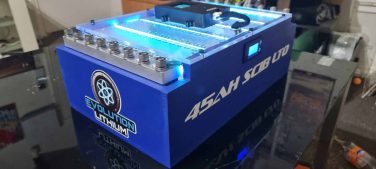
For an Evolution Lithium SCiB LTO battery bank, the bank should be securely mounted in the boot or rear cabin, close to the amplifiers and away from engine-bay heat. Use correctly sized OFC cable, protect every long positive cable run with appropriate fusing, establish low-resistance grounds and confirm the charging system is suitable before connecting the battery.
For serious high-current builds, Evolution Lithium generally recommends 2/0 OFC cable, multiple solid chassis grounds and correctly rated high-current fuse protection.
The goal is simple: minimise resistance between the electrical supply and the amplifiers so the system can deliver high current with less voltage drop.
This guide covers the overall installation process. For detailed cable calculations, battery sizing or charging-system modifications, use the dedicated Evolution Lithium guides linked throughout rather than treating battery installation as a one-size-fits-all exercise.
Key Takeaways
- Install an Evolution Lithium SCiB LTO bank in the boot or rear cabin, not under the bonnet.
- Position the battery close to the amplifiers where practical.
- Secure the bank so it cannot move during braking, cornering or vibration.
- Use high-quality OFC cable and properly crimped copper connections.
- Protect positive battery cable with correctly selected fuses.
- Keep grounds short, clean and capable of carrying the required current.
- Confirm alternator output and charging voltage before connecting the lithium bank.
- Test voltage at both the battery and amplifier under load after installation.
- Do not use additional battery capacity to hide inadequate wiring, grounding or alternator capacity.
What Should You Check Before Installing a Car Audio Battery?
Plan the complete electrical system before running cable.
Start by establishing:
- amplifier RMS power;
- expected electrical demand;
- alternator output;
- charging voltage;
- existing cable and grounding;
- secondary battery location;
- amplifier location;
- approximate cable lengths;
- available mounting space;
- required fuse and distribution hardware.
This matters because a battery and alternator perform different jobs.
The battery stores electrical energy, while the alternator replaces that energy while the engine is running. Installing a larger battery therefore does not automatically fix an electrical system that cannot replenish what the amplifiers consume.
If you have not already calculated the electrical requirements of the system, use the Evolution Lithium Car Audio Lithium Battery Calculator before choosing a bank.
For a more detailed calculation of battery capacity versus amplifier and alternator output, see How to Size Your Car Audio Battery and Alternator to Your Amplifier.
Keeping those calculations on the dedicated sizing page prevents guesswork without turning an installation guide into another battery-sizing article.
What Do You Need for a Car Audio Lithium Battery Installation?
Exact hardware varies with the build, but a high-current installation will normally require:
- appropriately sized OFC positive cable;
- matching ground cable;
- high-quality copper cable lugs;
- suitable battery terminals or busbars;
- correctly rated fuse holders and fuses;
- cable conduit or abrasion protection where required;
- rubber grommets through metal panels;
- heat-shrink and cable securing hardware;
- strong battery mounting hardware;
- a digital multimeter;
- appropriate crimping and hand tools.
The important principle is that every component in the current path must be capable of carrying the expected load.
There is little value installing a high-discharge lithium bank behind undersized cable, restrictive distribution hardware or poorly terminated connections.
Blue Sea Systems’ technical information on DC circuit protection reinforces the fundamental purpose of fusing: the protective device is primarily there to protect the conductor and circuit from excessive current.
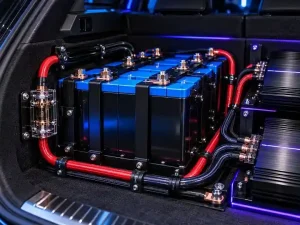
Where Should You Install the Secondary Lithium Battery?
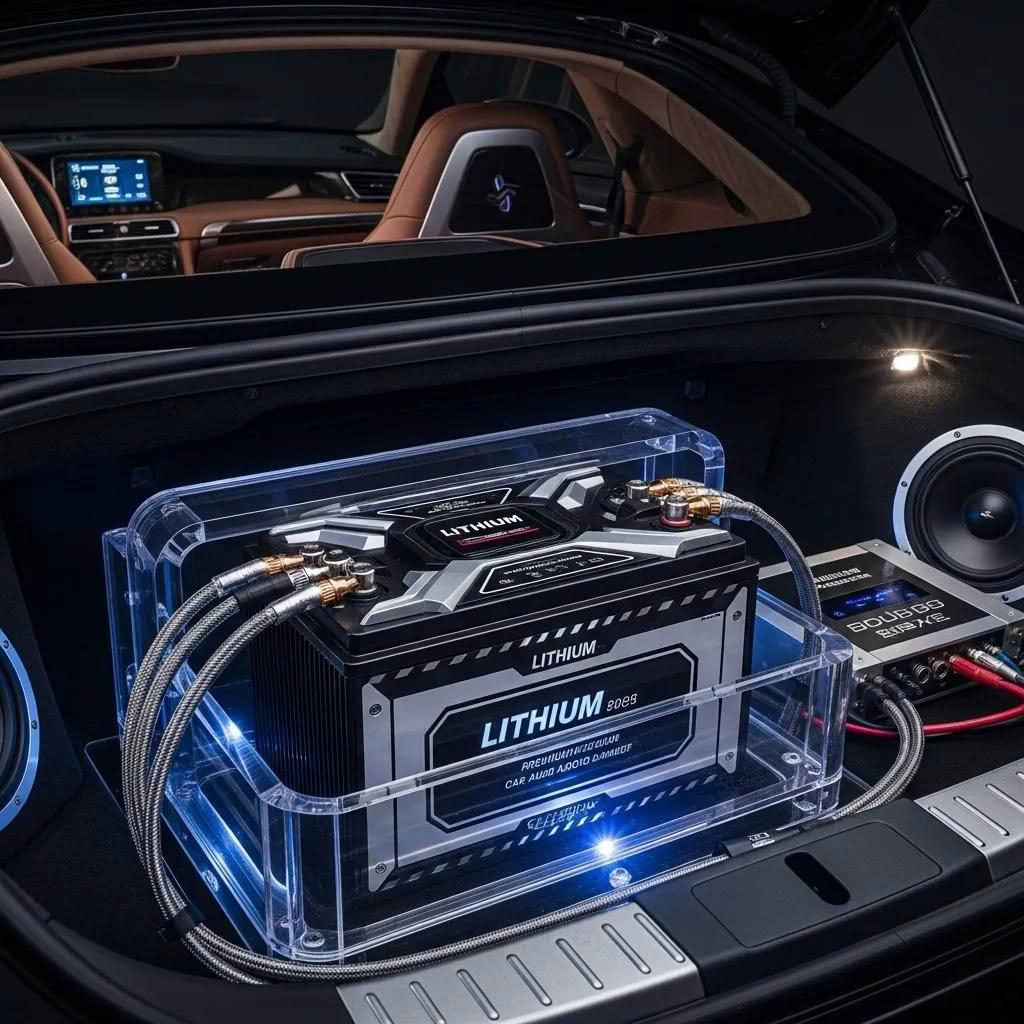
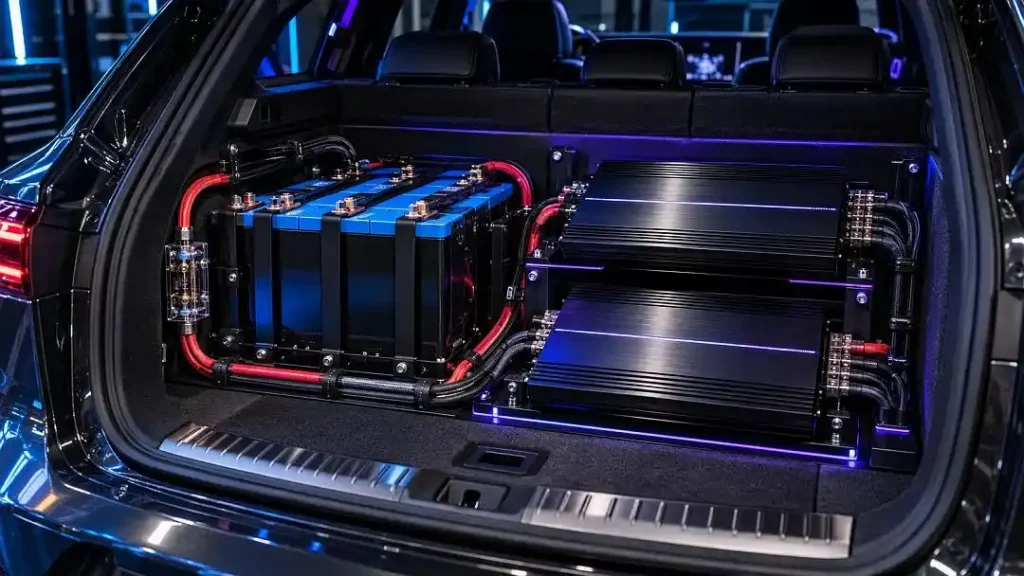
For an Evolution Lithium SCiB LTO bank, use the boot or rear cabin.
Do not mount these banks under the bonnet.
Rear placement has several practical advantages:
- lower exposure to engine-bay heat;
- less contamination from moisture and road debris;
- easier integration with rear-mounted amplifiers;
- shorter high-current runs between battery and amplifier;
- easier inspection and servicing.
The bank must also be mechanically secure.
It should not be able to slide, tip or move during hard braking, cornering, an accident or prolonged bass vibration. Terminals and exposed conductive parts should be protected against accidental contact with tools, cargo or vehicle metalwork.
Where possible, place the battery relatively close to the amplifier rack. Shortening the high-current path reduces resistance and helps minimise voltage drop between the bank and amplifiers.
For a more detailed discussion specifically about boot installations, see the Lithium Battery Trunk Install Guide for Car Audio.
How Should You Route the Main Power Cable?
Plan the entire cable route before cutting the cable.
The positive cable should follow a protected route from the charging source to the rear electrical system without rubbing against sharp metal, hot components or moving vehicle parts.
Whenever cable passes through sheet metal, use a suitable grommet or bulkhead fitting.
Secure long cable runs so normal vehicle movement cannot gradually wear through the insulation.
For high-power Evolution Lithium builds, 2/0 OFC is commonly used as the main-current baseline, although the final cable requirement depends on current, run length and system design.
If you need detailed electrical calculations rather than the installation overview, use How to Wire an LTO Battery Bank Safely in a Car. That guide covers cable sizing and voltage-drop considerations in more detail.
Why Does the Positive Cable Need Fusing?
A battery can deliver extremely high current into a short circuit.
If a positive cable is damaged and contacts the vehicle chassis without appropriate circuit protection, the cable itself can become the load. The resulting current can rapidly generate dangerous heat.
For that reason, fuse placement is fundamentally about protecting the cable.
A long positive cable connected to electrical energy sources at opposite ends needs protection appropriate to the architecture of that circuit.
Use fuse holders designed for the required DC current and ensure:
- the fuse rating protects the cable;
- the holder can safely carry the expected current;
- connections are tight and mechanically secure;
- exposed terminals cannot contact vehicle metal;
- fuse locations remain accessible for inspection.
High-current fuse systems are available specifically for large DC battery circuits. Blue Sea Systems, for example, documents high-current battery fuse systems for demanding DC applications.
Do not simply fit the largest fuse available. The protection must be coordinated with the cable and electrical design.
How Should You Ground a High-Power Car Audio Battery?
The return path is just as important as the positive supply.
A poor ground adds resistance to the circuit. At high current, even seemingly small resistance can create substantial voltage drop and heat.
A good installation uses:
- short ground paths where practical;
- clean bare-metal chassis connections;
- appropriately sized OFC cable;
- quality copper lugs;
- mechanically strong fasteners;
- multiple suitable grounding points where the system design requires them.
Paint, corrosion, loose fasteners and small factory grounding straps can all become restrictions when amplifier demand moves into hundreds of amps.
For the full grounding procedure, including preparation and testing of ground points, see Proper Grounding Techniques for Car Audio.
Should You Complete the Big 3 Upgrade?
For high-power systems, upgrading the vehicle’s main charging and grounding paths is often an important part of preparing the electrical system.
The commonly called Big 3 addresses the primary high-current connections around the alternator, battery and vehicle grounding system.
The exact configuration depends on the vehicle, but the objective is consistent: reduce unnecessary resistance in the paths responsible for moving charging current through the vehicle.
Do not assume that installing a powerful rear battery removes the need to address restrictive factory wiring at the front of the vehicle.
A strong battery behind weak charging cable simply moves the bottleneck.
What Charging Voltage Does a 6S SCiB LTO Bank Need?
Charging voltage needs to be considered before installation, but it should not be redesigned from within an installation guide.
Toshiba lists a nominal cell voltage of 2.4V for its high-power SCiB cells and documents their high-rate discharge and rapid-charge characteristics in its SCiB technical information.
For applicable Evolution Lithium 6S SCiB car-audio banks, our preferred everyday charging region is generally around 15.6–15.9V, provided the entire electrical system is compatible with that voltage.
Do not interpret that as permission to increase every vehicle to 15.8V.
Before changing charging voltage, verify the operating limits of:
- amplifiers;
- DSP and signal equipment;
- head unit;
- factory electronics;
- relays and accessories;
- alternator and regulator;
- installed battery configuration.
A standard factory charging system operating around the low-14V region will not use the same operating window as a correctly configured high-voltage SCiB installation.
If your charging system needs modification, use the dedicated guide How to Increase Your Vehicle’s Charging Voltage to Over 15.6V for Car Audio Systems.
That subject deserves its own engineering decision rather than a few generic instructions inside a battery-installation article.
Can You Run AGM and SCiB LTO Together?
For Evolution Lithium installations, do not parallel an AGM battery directly with the SCiB LTO bank as a permanent combined battery system.
The chemistries operate differently and are not treated as interchangeable batteries simply because both can appear in automotive electrical systems.
If you are converting an existing AGM car-audio build to LTO, design the electrical system around the chosen battery chemistry rather than treating the lithium bank as an add-on to the previous AGM arrangement.
This is especially important when the charging system is configured for the higher operating voltage used by a 6S SCiB setup.
What Order Should You Follow During Installation?
Once the system has been designed, use a controlled installation sequence.
1. Confirm the Electrical Design
Verify battery size, charging voltage, cable requirement, fuse architecture and alternator capability before modifying the vehicle.
2. Choose and Prepare the Battery Location
Test-fit the bank and mounting hardware.
Confirm that terminals remain accessible while being protected from accidental short circuits.
3. Plan the Cable Route
Identify firewall or body penetrations, potential abrasion points, moving components and heat sources.
Install protection before pulling cable through the vehicle.
4. Prepare the Charging and Grounding System
Complete required charging-cable and ground upgrades before connecting the new battery.
5. Install the Required Fuse Holders
Install circuit protection in the correct positions before energising long positive runs.
Do not insert the final fuses until the wiring has been completed and checked.
6. Run and Terminate the Cable
Use properly prepared copper lugs and mechanically sound crimps.
A termination that looks acceptable can still create resistance if the conductor is poorly crimped inside the lug.
7. Secure the Battery
Mount the bank permanently.
Check terminal clearance and protect exposed conductive surfaces.
8. Connect the Amplifier Distribution
Keep the high-current path from the battery to the amplifiers short and appropriately sized.
9. Check Everything Before Energising
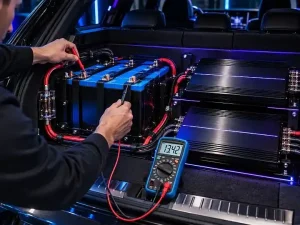
Use a multimeter to confirm:
- correct polarity;
- expected battery voltage;
- no accidental connection between positive and chassis;
- sound ground connections;
- correct fuse installation;
- charging voltage within the intended range.
Only then should the system be energised.
How Do You Test the Installation Under Load?
A resting voltage reading is useful, but it does not prove that the installation performs correctly at high current.
After the initial checks, start the vehicle and measure charging voltage.
Then test the audio system progressively rather than immediately operating at maximum output.
Measure voltage:
- directly across the battery bank;
- directly across the amplifier positive and ground terminals;
- under a repeatable audio load.
The comparison between those measurements is useful.
If the battery remains at a strong voltage while the amplifier terminals fall significantly lower, the battery itself is unlikely to be the first problem.
The voltage is being lost somewhere in the path between them.
Possible causes include:
- cable resistance;
- poor crimps;
- restrictive fuse holders;
- loose terminals;
- distribution hardware;
- inadequate grounding.
This is why measuring voltage at the amplifier is more informative than simply watching a dashboard voltmeter.
What Should You Check After the First High-Load Test?
Stop and inspect the system after its first controlled high-current session.
Check:
- battery terminals;
- ground points;
- cable lugs;
- fuse holders;
- distribution blocks;
- cable temperature;
- mounting hardware.
Unexpected heating usually indicates resistance.
A hot connection should not be accepted as normal simply because the audio system still works.
Find the restriction and correct it.
What Problems Will a Second Battery Not Fix?
A lithium battery is not a universal cure for every car-audio problem.
Installing more battery capacity will not correct:
- an undersized alternator;
- inadequate charging voltage;
- poor grounds;
- undersized power cable;
- amplifier clipping;
- incorrect gain settings;
- unsuitable crossover settings;
- badly designed enclosures;
- damaged speakers or subwoofers.
This distinction protects your budget.
Electrical reserve solves an electrical supply problem. It does not repair acoustic, tuning or equipment problems.
Likewise, if the charging system cannot replace the energy being removed from the battery bank, simply increasing battery capacity extends the time before the same energy deficit appears.
Why SCiB LTO Works Well for High-Power Car Audio
SCiB LTO is particularly useful in applications where high current delivery and rapid energy recovery matter.
Toshiba describes its high-power SCiB cells as providing stable discharge capability at large discharge current, while also supporting very rapid charging. The manufacturer lists its high-power cells at a nominal 2.4V per cell.
Those characteristics align well with high-power car audio, where the battery may need to deliver significant current during bass transients and then recover quickly as alternator output becomes available.
The battery still needs the correct electrical environment around it.
Good cells cannot compensate for poor cable, weak grounds or an inadequate charging system.
Frequently Asked Questions
Where should I install a secondary lithium battery for car audio?
Install an Evolution Lithium SCiB LTO battery in the boot or rear cabin, preferably reasonably close to the amplifiers. Do not install these banks under the bonnet. The battery must be securely mounted and its terminals protected against accidental short circuits.
What cable should I use for an LTO car-audio battery?
For serious high-current Evolution Lithium installations, 2/0 OFC is commonly recommended as the main power-cable baseline. Final cable sizing still depends on current, cable length and system architecture. Use the dedicated LTO battery wiring guide for detailed calculations.
Do I need to fuse both ends of a battery cable?
Where a long positive conductor can receive fault current from electrical sources at opposite ends, the circuit needs protection appropriate to that architecture. The purpose is to prevent the cable from carrying destructive short-circuit current.
Can I install an LTO battery with my factory alternator?
Sometimes, but compatibility cannot be determined from alternator size alone. Charging voltage, available current, regulator behaviour, amplifier demand and the intended LTO configuration all matter. Check those factors before installation.
What voltage should a 6S SCiB LTO car-audio battery charge at?
Evolution Lithium generally targets approximately 15.6–15.9V for applicable 6S SCiB performance installations. The complete vehicle and audio system must be compatible with the selected voltage. Do not simply increase alternator voltage without checking the dedicated charging-voltage guide.
Will adding a second battery stop my headlights dimming?
It can improve available reserve and voltage stability when the electrical system is correctly designed, but dimming can also indicate inadequate alternator output, poor grounds, restrictive wiring or excessive system demand. Diagnose the cause rather than assuming more battery capacity is automatically the answer.
How do I know whether the installation has too much voltage drop?
Measure voltage directly at the battery and then at the amplifier terminals under the same load. A significant difference between the two readings indicates resistance somewhere in the supply or return path.
Can I run AGM and SCiB LTO together?
Evolution Lithium does not recommend directly paralleling AGM and SCiB LTO as a permanent combined bank. Design the system around the chosen battery chemistry and its required operating voltage.
Final Checks Before Running Full Power
Before pushing the system hard, confirm:
- battery firmly mounted;
- terminals protected;
- correct polarity;
- cable protected through all metal penetrations;
- fuse ratings appropriate for the conductors;
- all high-current connections tight;
- grounds prepared correctly;
- charging voltage verified;
- amplifier operating-voltage limits confirmed;
- voltage tested directly at the amplifier under load;
- no abnormal heat at cables, fuses or terminals.
A properly installed lithium battery does more than add capacity. It becomes part of a complete electrical system designed to move current efficiently from the alternator and battery bank to the amplifiers.
For high-power New Zealand car-audio builds, that means proper mounting, low-resistance OFC wiring, correctly selected circuit protection, strong grounding and a charging system matched to the SCiB LTO bank.
Get those fundamentals right first. The performance of the battery—and the amplifiers connected to it—depends on everything around it.