 Skip to content

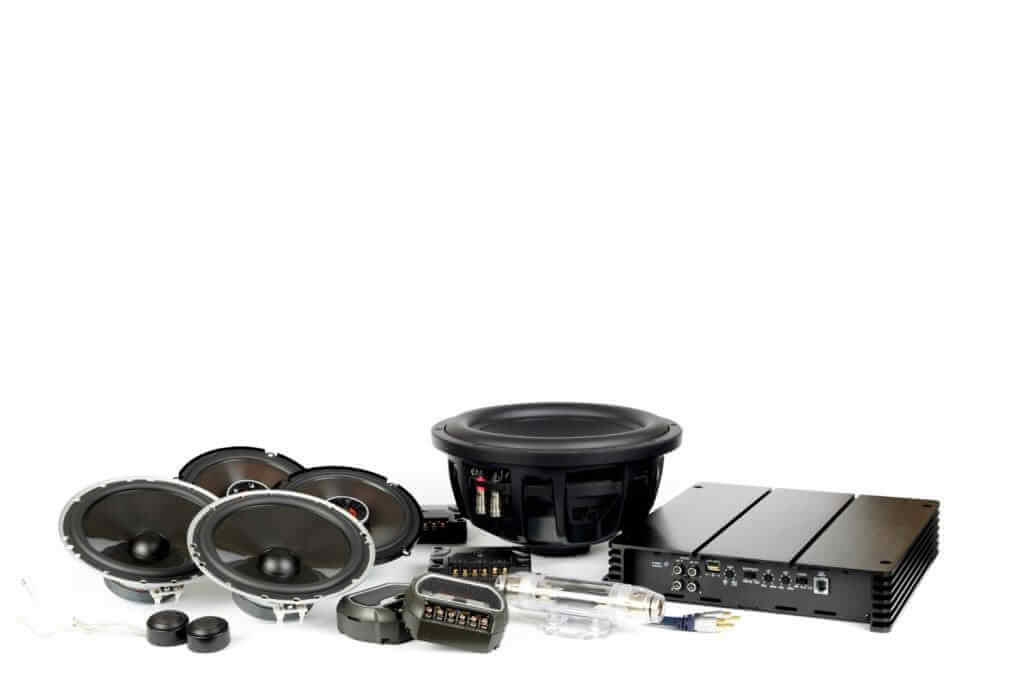
Why Is My Car Audio Producing No Sound? Common Causes and Fixes
What Are the Symptoms of No Sound in Car Audio Systems?
When your car audio system goes silent, you might notice these tell-tale signs:
- Complete silence from your speakers, even when the head unit is on.
- The display and controls light up, but no audio comes out.
- Occasional clicks or pops, but no continuous music or radio.
- Some speaker channels work, while others remain dead.
- Amplifier indicator lights flicker or the unit shuts down immediately.
These symptoms point to potential issues with power delivery, signal connections, or the components themselves. It’s time to inspect fuses, wiring, the head unit, and the battery to find the root cause.
How to Check Fuses and Wiring for No Sound Issues
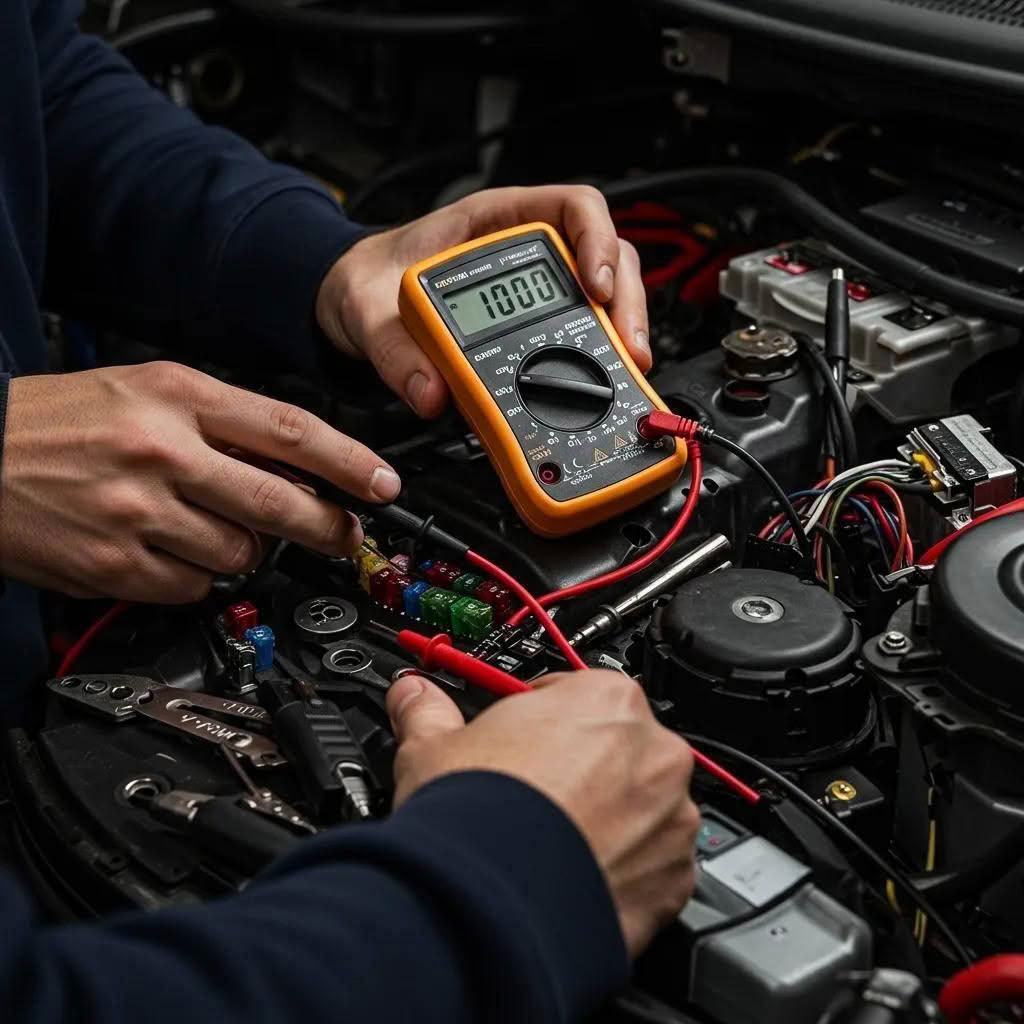
To ensure your fuses and wiring are in good shape, follow these steps:
- Use a multimeter to check the main 12V power fuse and the remote turn-on fuse for continuity.
- Inspect the ground connections at the chassis and amplifier for any signs of corrosion or looseness.
- Trace the speaker wires from the head unit to each speaker, looking for any cuts or pinched insulation.
- Test the RCA cables connecting the head unit to the amplifier for bent pins or damaged shielding.
- Replace any blown fuses and tighten or re-terminate any loose ground or power wires.
By confirming that your fuses are intact and your wiring connections are solid, you’ll rule out power interruptions and can move on to checking signal and component issues.
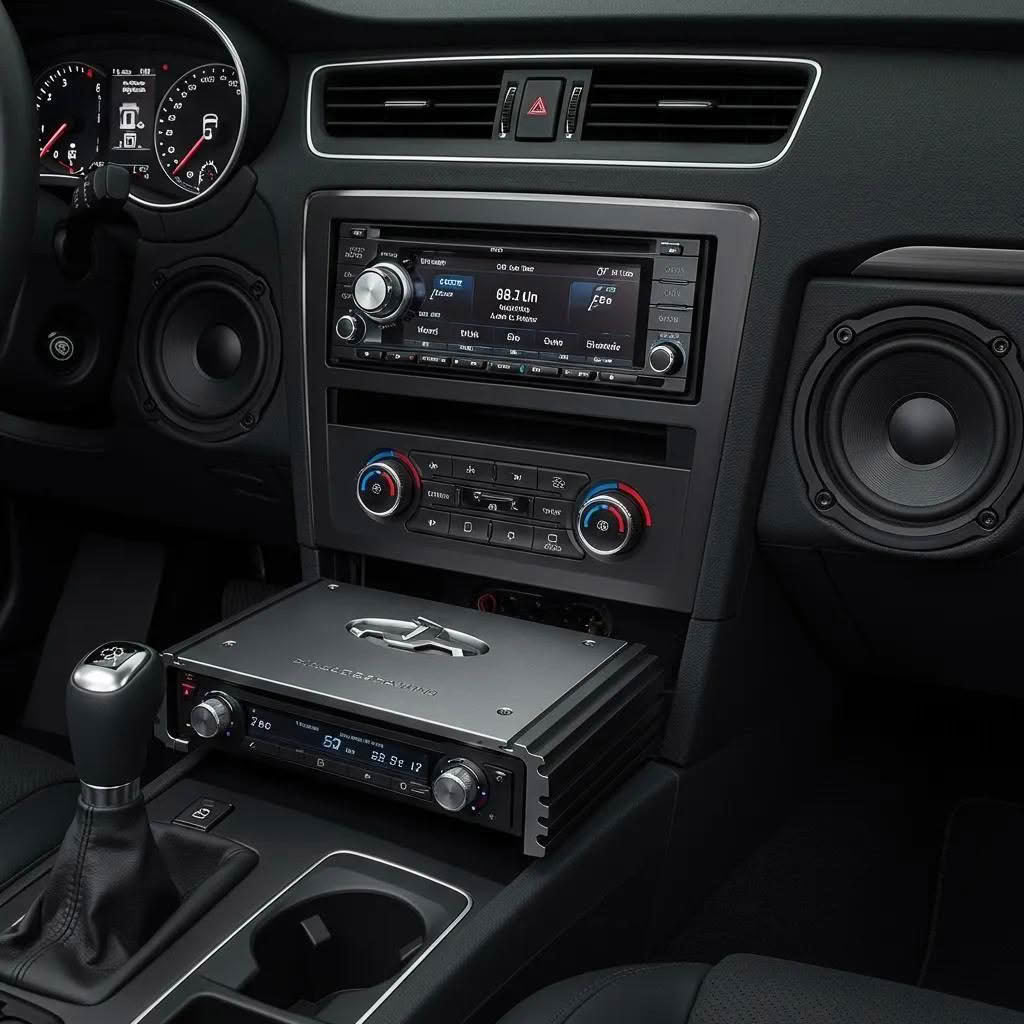
How Can Head Unit and Amplifier Problems Cause No Audio Output?
A faulty head unit or amplifier can disrupt the audio signal in several ways:
- Internal amplifier failure within the head unit, preventing pre-out signals.
- The remote turn-on wire not activating the external amplifier.
- Software glitches or incorrect settings on the head unit muting channels.
- Amplifier protection mode being triggered due to an overload or internal fault.
Checking the head unit’s audio settings, trying a known-good amplifier, and verifying the remote turn-on voltage will help you distinguish between component failures and wiring problems.
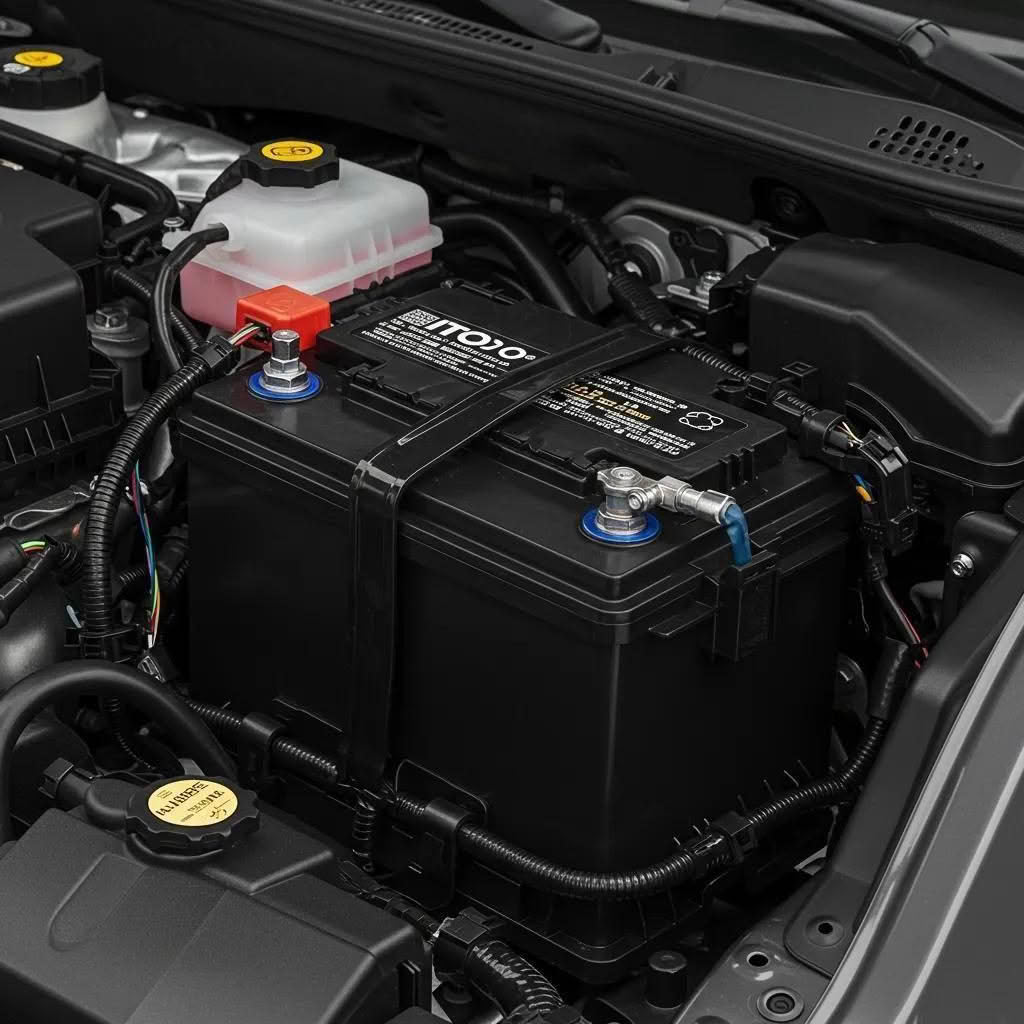
When Should You Consider Battery or Power Supply Issues?
Sometimes, a lack of sound is due to insufficient voltage or current from your battery or alternator. You might notice the head unit rebooting or amplifier lights flickering in these cases:
- Voltage dropping below 11.5V during engine cranking or heavy bass playback suggests a weak battery.
- Alternator whine audible through the speakers indicates issues with the charging system.
- The amplifier shutting off when under load points to voltage drops in the power supply.
For systems with high power demands, upgrading to an LTO lithium battery provides stable voltage, prevents power cutoffs during peak current draw, and ensures consistent audio output. Addressing power supply issues naturally leads into troubleshooting distorted sound.
How to Troubleshoot Distorted or Fuzzy Car Audio Sound
What Causes Car Speaker Distortion and How to Diagnose It?
Speaker distortion occurs when the speaker cones can’t accurately reproduce the audio signal under certain conditions:
- Excessive cone movement from too much input gain can cause rattling.
- Damaged voice coils result in scratchy or buzzing sounds.
- An impedance mismatch between the amplifier and speaker can lead to clipping.
Start your diagnosis by turning down the amplifier gain, playing test tones at a moderate volume, and listening for any buzzing, crackling, or rattling. This will help you determine if the distortion is due to speaker damage or amplifier overload, guiding your repair efforts.
How Does Amplifier Clipping and Gain Settings Affect Sound Quality?
Amplifier clipping happens when the output stage can no longer handle the signal cleanly, introducing harsh harmonics instead of smooth sine waves:
- Setting the gain too high forces the amplifier into clipping, distorting the signal’s peaks.
- Turning the head unit volume up too high sends a signal that exceeds the amplifier’s capacity.
- Insufficient voltage from the battery makes clipping worse, especially during bass-heavy passages.
By adjusting the gain to produce a clean sine wave on an oscilloscope or tone generator, you can prevent clipping, enhance audio fidelity, and protect your amplifiers and speakers.
Can Wiring and Grounding Problems Lead to Distortion?
Subpar wiring or grounding can introduce resistance, voltage drops, and noise, all of which can manifest as distortion:
- Thin or corroded ground wires increase impedance, leading to unstable signals.
- Loose power connections cause fluctuating voltage, resulting in crackling under load.
- Sharing ground points between audio and power circuits can generate harmonic distortion.
Upgrading to appropriately gauged wiring, securing dedicated ground points, and keeping signal cables separate from power leads will restore clean signal integrity.
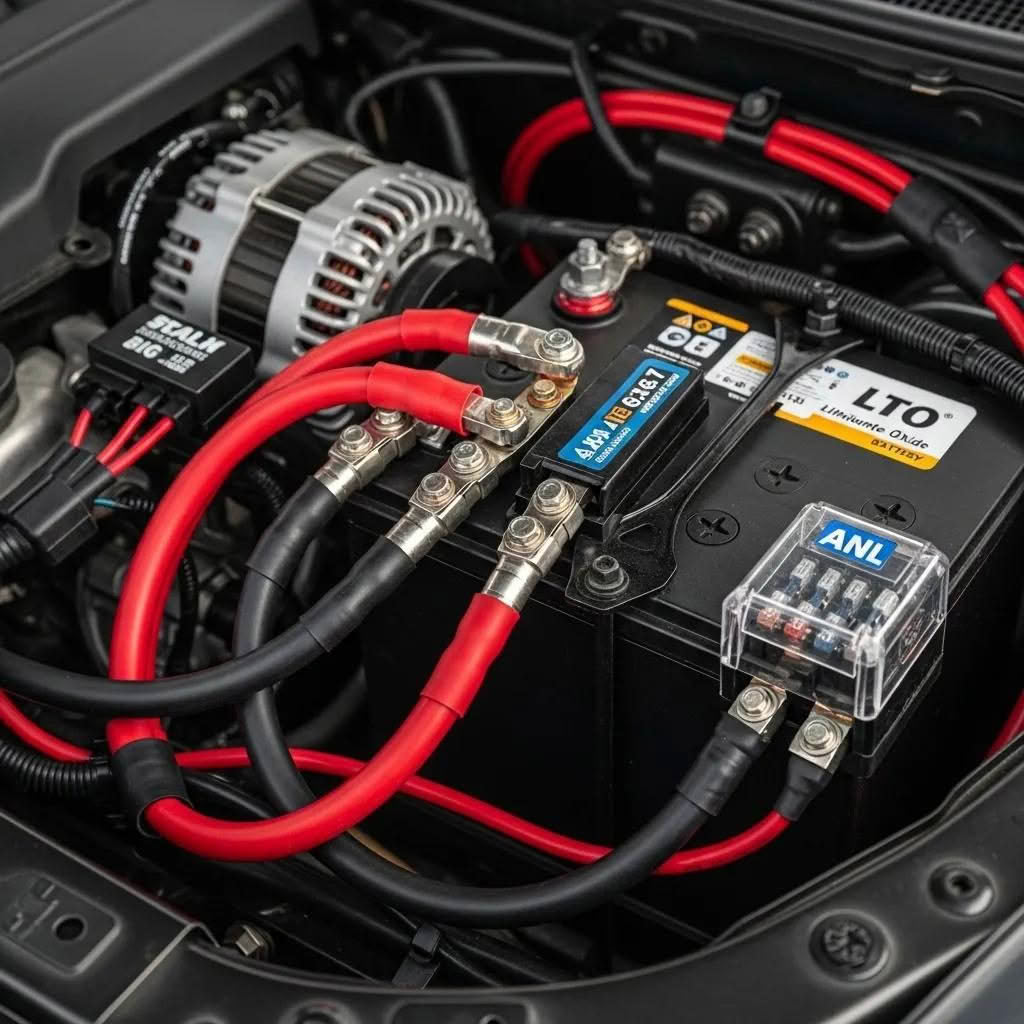
How Do LTO Lithium Batteries Help Prevent Power-Related Distortion?
LTO lithium batteries provide stable power even during rapid discharge and recharge cycles, minimizing distortion caused by voltage fluctuations:
- Their high discharge capability maintains consistent voltage during intense bass transients.
- Fast recharge rates quickly restore voltage between musical peaks, preventing clipping.
- Steady terminal voltage allows amplifiers to operate linearly across all volume levels.
By delivering a rock-solid power foundation, LTO batteries enhance audio clarity, reduce fuzzy artifacts, and ensure pristine sound even at high output levels.
Benefits of LTO Lithium Batteries in Car Audio Systems
What Causes Static, Noise, and Interference in Car Audio Systems?
How to Identify and Fix Ground Loop Noise and Alternator Whine
Ground loop noise and alternator whine create low-frequency hums or pitch-modulated tones when different ground potentials or charging systems introduce interference into the audio signal path.
Implementing a star-grounding configuration and filtering noise at its source will eliminate these hums, allowing for interference-free audio.
What Wiring Issues Lead to Static and How to Resolve Them?
Static, or crackling, can occur when wiring insulation deteriorates or connections vibrate due to engine movement:
- Loose RCA connectors can cause intermittent contact, leading to static clicks.
- Exposed speaker wires rubbing against metal panels can create shorts and crackles.
- Inadequate shielding on signal cables can allow radio frequency interference to enter the system.
Securing connectors, routing cables away from moving parts, and using properly shielded wiring harnesses will resolve static issues and prepare the system for component checks.
How Can Faulty Components Like Fuses and Amplifiers Cause Noise?
Even minor issues with fuses or amplifiers can introduce hiss or crackle into your audio:
- Blown or high-resistance fuses in the power or ground lines can cause hiss.
- Failing amplifier modules may generate constant background noise.
- Thermal stress in an overloaded amplifier can increase the noise floor.
Replacing fuses with the correct type and servicing any faulty amplifiers will eliminate unwanted noise and restore a silent background for your music.
How to Reset and Fix Amplifier Protection Mode Issues
What Triggers Amplifier Protection Mode in Car Audio Systems?
Amplifier protection mode activates when internal safeguards detect conditions that could potentially damage the unit:
- Shorted speaker leads or an impedance lower than the amplifier’s minimum rating.
- Overheating due to prolonged high-power operation without adequate cooling.
- Voltage levels falling outside the safe operating range.
Understanding these triggers will help you address short circuits, improve ventilation, and stabilize the power supply voltage before attempting a reset.
How to Diagnose Power Supply and Wiring Problems Causing Protect Mode
Protection mode resets can sometimes mask underlying power supply issues. To diagnose these problems:
- Measure the battery and alternator voltage while the engine is idling and at higher RPMs.
- Inspect the gauge of your power and ground wires to check for voltage drop under load.
- Verify that the remote turn-on circuit is providing a steady 12V signal.
This process helps identify power supply irregularities that repeatedly trigger the amplifier’s protection mode and indicates where upgrades might be necessary.
What Are the Steps to Safely Reset Your Car Audio Amplifier?
Follow these steps to safely reset your amplifier:
- Turn off the head unit and disconnect the remote turn-on wire.
- Remove the amplifier’s main power fuse or switch off its power terminal.
- Wait at least 30 seconds to allow internal capacitors to discharge fully.
- Reinstall the fuse or reconnect the power terminal and the remote turn-on wire.
- Turn on the head unit and confirm normal operation before increasing the volume.
Adhering to this sequence helps prevent damage and ensures that the underlying issues causing the protection mode have been resolved.
How Do LTO Lithium Batteries Support Stable Amplifier Operation?
LTO batteries maintain a clean power supply under high discharge rates, reducing the likelihood of protection mode activation:
- Their rapid discharge and recharge cycles provide instant current when needed.
- Minimal internal resistance keeps voltage stable, even during intense bass notes.
- Consistent output voltage prevents under-voltage triggers in the protection circuits.
By delivering unwavering voltage, LTO batteries minimize protective shutdowns and enable reliable, uninterrupted performance.
How to Diagnose and Fix Car Stereo Wiring Problems
What Are Common Wiring Problems in Car Audio Systems?
Faulty wiring can lead to no sound, noise, or distortion through various issues:
- Using an incorrect gauge power wire can cause voltage drop under load.
- Multiple ground points can create ground loop interference.
- Loose speaker connectors may result in intermittent audio.
- Damaged RCA shields can allow electromagnetic interference to enter the signal path.
Identifying each specific wiring fault allows for targeted repairs and ensures reliable connectivity.
How to Test and Repair Faulty Wiring Connections
Use both visual inspection and electrical tests to repair wiring issues:
- Visually inspect all connectors for corrosion, bent pins, or exposed wires.
- Use a multimeter to check continuity and resistance across power, ground, and signal wires.
- Re-terminate any splices using solder and heat-shrink tubing for a secure connection.
- Replace damaged sections of wiring harnesses with correct-gauge, shielded cables.
Restoring wiring integrity will eliminate intermittent faults and set the stage for proper grounding techniques.
Why Is Proper Grounding Crucial for Car Audio Performance?
Proper grounding ensures low-resistance return paths, which prevents noise and voltage instability:
- A single, solid ground point connected to bare metal avoids loops and hum.
- Using thick, short ground cables minimizes resistance and voltage drop.
- Clean metal contact surfaces maintain consistent grounding even under vibration.
Effective grounding is fundamental to all troubleshooting efforts, as it stabilizes reference voltages and supports a clean signal flow.
The Critical Role of Proper Grounding in Car Audio Performance
How to Prevent Voltage Drop Through Correct Wiring and Battery Choice
To avoid voltage drop:
- Use power and ground cables that are 4 AWG or thicker for high-power systems.
- Opt for LTO lithium batteries, which offer low internal resistance and stable voltage.
- Route cables directly with minimal length and avoid sharp bends.
By combining the correct wiring gauge with an LTO battery, you ensure efficient current delivery and maintain optimal audio performance.
What Are the Power Requirements for Car Audio Systems and How to Meet Them?
How Does Insufficient Power Cause Audio Problems Like Distortion and Cut-Outs?
When a battery or alternator can’t meet the peak current demands of your system, you’ll experience audio problems such as:
- Amplifier clipping during bass peaks, introducing harsh distortion.
- Head unit resets or cut-outs when the voltage drops below safe operating levels.
- Inconsistent volume levels as the voltage fluctuates under load.
Understanding these effects highlights the importance of meeting your system’s power requirements to ensure distortion-free, uninterrupted playback.
Why Are LTO Lithium Batteries Ideal for Car Audio Power Supply?
LTO lithium batteries are exceptionally well-suited for demanding audio applications due to:
- Their exceptional discharge rates, delivering high current instantly.
- Ultra-low internal resistance, which keeps voltage stable under heavy load.
- Rapid recharge cycles that restore full capacity between musical passages.
- An extended cycle life, reducing the need for frequent replacements.
These features translate into clean, reliable power and superior sound clarity for both everyday listening and competitive environments.
How to Install and Optimize LTO Lithium Batteries for Stable Power Delivery
Follow these best practices for installing your LTO battery:
- Securely mount the battery using vibration-damping brackets.
- Connect 1/0 AWG power and ground cables directly to the battery terminals.
- Install a fuse within 150 mm of the positive terminal for safety.
- Apply anti-corrosion spray to the terminals and ensure all torque specifications are met.
Proper installation guarantees you’ll benefit fully from the battery’s stable output and protects your vehicle’s electrical system.
How Do LTO Batteries Prevent Voltage Drop and Improve Sound Quality?
By providing minimal voltage sag under load, LTO batteries:
- Maintain amplifier headroom, allowing for clean bass reproduction.
- Prevent micro-cutouts that can cause stuttering or clicking sounds.
- Support linear amplifier performance across all volume levels.
This stability results in consistent sound quality, free from power-related artifacts that detract from the listening experience.
Why Are LTO Batteries Recommended for SPL Competition Setups?
For SPL competitions, LTO batteries offer:
- Instantaneous burst currents exceeding 1000A, crucial for deep bass impact.
- Consistent voltage throughout extended sessions without overheating.
- A lightweight design, allowing for more space and weight for amplifiers and subwoofers.
These advantages are key to achieving peak SPL performance, ensuring that even the most demanding audio systems operate at their full potential.
How to Maintain and Prevent Common Car Audio System Problems
What Regular Checks Can Prevent No Sound and Distortion Issues?
Consistent maintenance can prevent many common audio faults:
- Inspect and tighten power, ground, and signal connections every three months.
- Test fuse continuity and replace any that show increased resistance.
- Run low-volume sine-wave tests across all channels to detect early signs of distortion.
Regular checks help catch minor issues before they become major problems, keeping your system reliable and enjoyable.
How to Keep Wiring and Grounding in Optimal Condition
To maintain wiring integrity:
- Clean ground attachment points and reapply contact enhancer annually.
- Prevent cable chafing by using split-loom tubing and secure fasteners.
- Replace signal cables that show signs of shield damage to prevent noise intrusion.
Well-maintained wiring and grounding ensure clean signal paths and consistent performance over time.
When to Upgrade Your Battery to an LTO Lithium Battery for Long-Term Reliability
Consider upgrading to an LTO battery when:
- You experience voltage sag during bass peaks, even with proper wiring.
- You find yourself frequently replacing the battery or straining the alternator with standard batteries.
- You plan to expand your system and require higher current delivery capabilities.
Making the switch to an LTO battery at these points provides lasting reliability and reduces long-term maintenance needs.
How to Use Troubleshooting Guides and Tools Effectively
Maximize your diagnostic success by:
- Following structured troubleshooting flowcharts for systematic checks.
- Using a reliable multimeter and test tone generator to quantify faults.
- Documenting each test result and repair action to track patterns over time.
With clear guides and the right tools, you can efficiently pinpoint and resolve audio system issues.
Restoring your car audio system’s full potential relies on thoroughly diagnosing sound and power issues, performing precise repairs, and implementing robust preventive measures. With correct wiring, efficient grounding, and stable power sources—especially LTO lithium batteries—you can ensure clear, distortion-free audio for both daily drives and high-SPL installations. Follow these strategies to maintain optimal performance and leverage Evolution Lithium’s advanced power solutions for enduring reliability.