What is The Best Car Audio Subwoofer ?
Car Audio Subwoofer NZ: How to Choose, Install, and Upgrade for the Best Bass Experience
A car audio subwoofer reproduces low-frequency sound that standard speakers cannot, delivering the tactile bass that defines modern music and in-car listening experiences. This guide explains what a subwoofer does, how enclosure type and impedance affect performance, and why power delivery — from amplifiers to advanced batteries like LTO lithium battery systems — matters for clean, reliable bass in NZ vehicles. Many drivers face issues such as voltage sag, limited boot space, or muddy low end; understanding component choices and installation best practices solves those problems while preserving audio fidelity and electrical safety. You will learn how to select the right size and RMS-rated subwoofer for your car, match it to an amplifier, integrate proper wiring and the “Big 3” upgrade, and use LTO batteries to stabilise transient power for peak bass. The article also covers step-by-step wiring, tuning techniques using crossover and DSP, troubleshooting common faults, and maintenance tips tailored to New Zealand conditions. Read on to identify the optimal subwoofer setup for SPL or fidelity-focused builds and to plan safe, efficient integration with vehicle electrical systems.
What Is a Car Audio Subwoofer and Why Is It Essential for Your NZ Vehicle?
A car audio subwoofer is a dedicated low-frequency driver designed to reproduce bass below roughly 120 Hz, creating the depth and impact missing from full-range speakers. By handling low frequencies, the subwoofer reduces excursion demands on midrange speakers, which improves clarity and headroom across the entire car audio system. In NZ vehicles where cabin size, boot space and vehicle type vary widely, a dedicated subwoofer allows listeners to tailor bass response without overdriving door speakers or risking distortion. The following list summarises practical reasons drivers choose a subwoofer and sets up the next section on available subwoofer types and installation choices.
Subwoofer benefits for NZ drivers include:
- Improved clarity: Dedicated low-frequency reproduction reduces distortion in mids and highs.
- Controlled bass: Properly tuned subwoofers deliver tight, accurate low end for different music genres.
- Reduced speaker stress: Main speakers operate with lower cone excursion, improving longevity.
These operational advantages lead into the practical choices of subwoofer types available in New Zealand and how each type maps to vehicle constraints and listening goals.
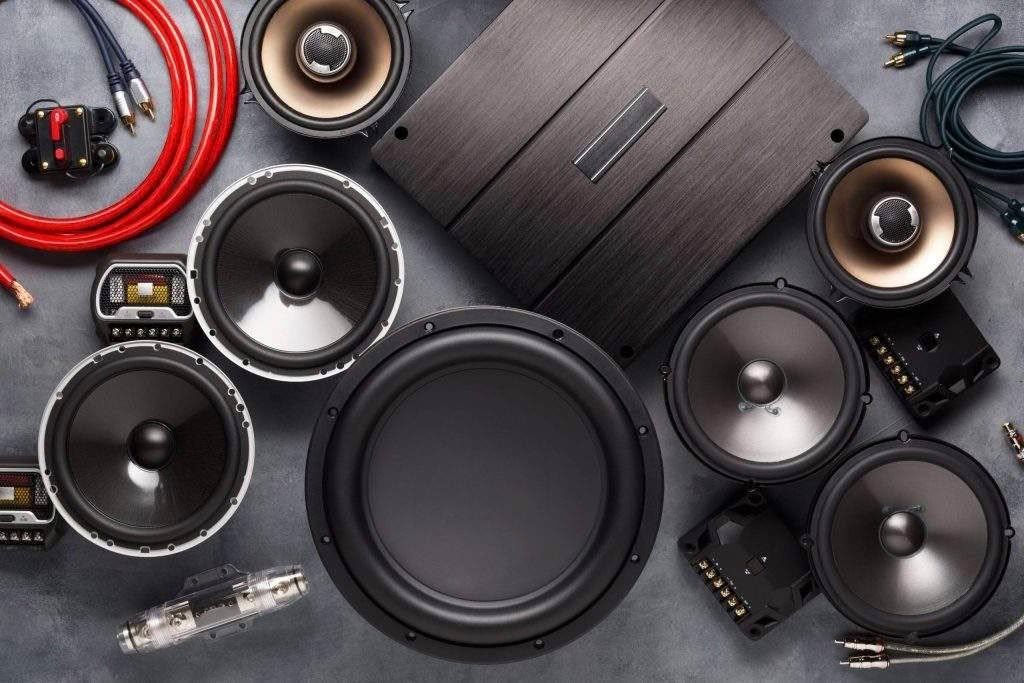
What Types of Car Subwoofers Are Available in NZ?
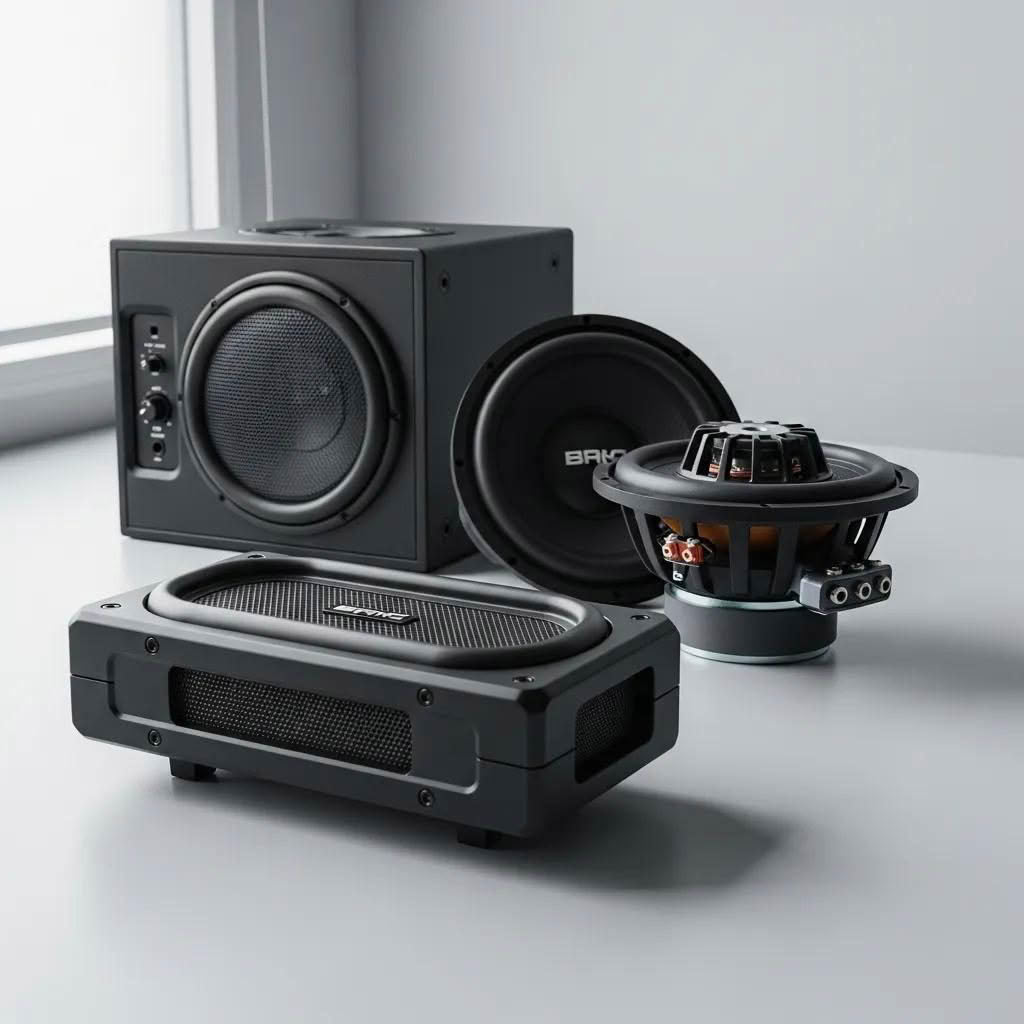
There are several hyponyms of subwoofer designs familiar to NZ installers and audiophiles, each balancing size, power and installation complexity. Underseat and slimline subwoofers suit compact cabins and retain boot space, while component passive subwoofers paired with external amplifiers offer flexibility and higher SPL potential. Powered subwoofers integrate amplifier and driver for simple installs, whereas sealed and ported enclosures alter transient response and low-frequency extension. Choosing between these types involves assessing vehicle space, desired SPL versus fidelity, and the available amplifier power and battery support.
When selecting a type, consider these practical mappings:
- Underseat/slimline: space-saving, moderate bass, low power needs.
- Component/passive: best for balanced fidelity with a dedicated amp.
- Powered/active: plug-and-play simplicity with integrated amplification.
Understanding these trade-offs prepares you to choose the right size and power rating for your use case in the next section.
How Does a Subwoofer Enhance Your Car Audio System’s Sound Quality?
A subwoofer enhances system-level sound by extending low-frequency response and freeing up midrange drivers to reproduce mids and highs with less distortion, which improves perceived detail and staging. The mechanism is straightforward: the subwoofer reproduces energy below the crossover point, allowing the main speakers to focus on their optimal frequency bands; this increases headroom and reduces intermodulation distortion. In practice, adding a correctly sized subwoofer results in punchier kick drums, deeper bass lines, and a cleaner overall mix that translates across genres from EDM to classical. The next section covers how to choose the best subwoofer size, RMS rating and enclosure to achieve these sonic benefits in NZ vehicles.
How to Choose the Best Car Audio Subwoofer NZ for Your Vehicle and Budget
Choosing a subwoofer combines measurable attributes (size, RMS power, impedance) with subjective goals (SPL versus fidelity) and vehicle constraints such as boot dimensions and underseat clearance. A systematic checklist helps narrow options quickly: assess available space, set a target RMS power with headroom, decide between sealed or ported enclosure depending on bass character, and confirm impedance options to match amplifier wiring. Below is a short decision checklist to guide purchases and prepare for installation.
Key selection checklist:
- Measure available installation space and note any clearance restrictions.
- Choose subwoofer size based on desired output: compact (8–10″), balanced (12″), or SPL (15″).
- Match RMS power and impedance to the amplifier, allowing ~1.25× RMS headroom.
- Select sealed enclosures for tight bass or ported enclosures for louder low-end extension.
This checklist leads into a concise comparison of common size and power combinations so you can map subwoofer choices to specific vehicle and listening scenarios.
Before the table, note: the table below compares typical sizes and use-cases so you can match an enclosure and RMS rating to your budget and vehicle constraints.
This comparison clarifies size-to-use-case choices and transitions into a deeper look at RMS, peak power and impedance matching in the following subsection.
What Size and Power Ratings Should You Consider for Your Subwoofer?
Subwoofer size determines low-frequency extension and cone area, while RMS rating governs sustainable power handling; together they define loudness, headroom and reliability. For NZ installations, an 8–10 inch driver suits small hatchbacks and underseat installs where space is limited, providing clean punch without excessive power needs. A 12 inch subwoofer typically offers the best balance for most sedans and wagons, delivering both controlled low end and room-filling output when paired with a correctly rated amplifier. When planning power, allow at least 1.25× the subwoofer’s RMS rating from the amplifier to avoid clipping and to provide headroom for transient peaks; this rule informs not only amplifier selection but also battery and alternator support strategies discussed later.
These sizing and power considerations lead naturally to enclosure and impedance choices that shape transient response and amplifier load.
How Do Enclosure Types and Impedance Affect Subwoofer Performance?
Enclosure type fundamentally changes a subwoofer’s frequency response: sealed enclosures prioritise transient accuracy and tight, controlled bass, while ported enclosures increase low-frequency efficiency and perceived loudness at the cost of slightly slower transient response. Impedance (1, 2, 4 ohm and DVC variants) affects amplifier load and wiring flexibility; dual voice coil designs allow wiring options to match amp channels or to lower the system impedance for higher power delivery. For installers, confirming the amp’s stable impedance range and the desired enclosure tuning frequency prevents mismatches that cause overheating or poor bass quality. The next section turns to battery technologies — specifically LTO lithium battery characteristics — that influence voltage stability and system reliability during heavy bass use.
How Do LTO Lithium Batteries Improve Car Audio Subwoofer Performance in NZ?
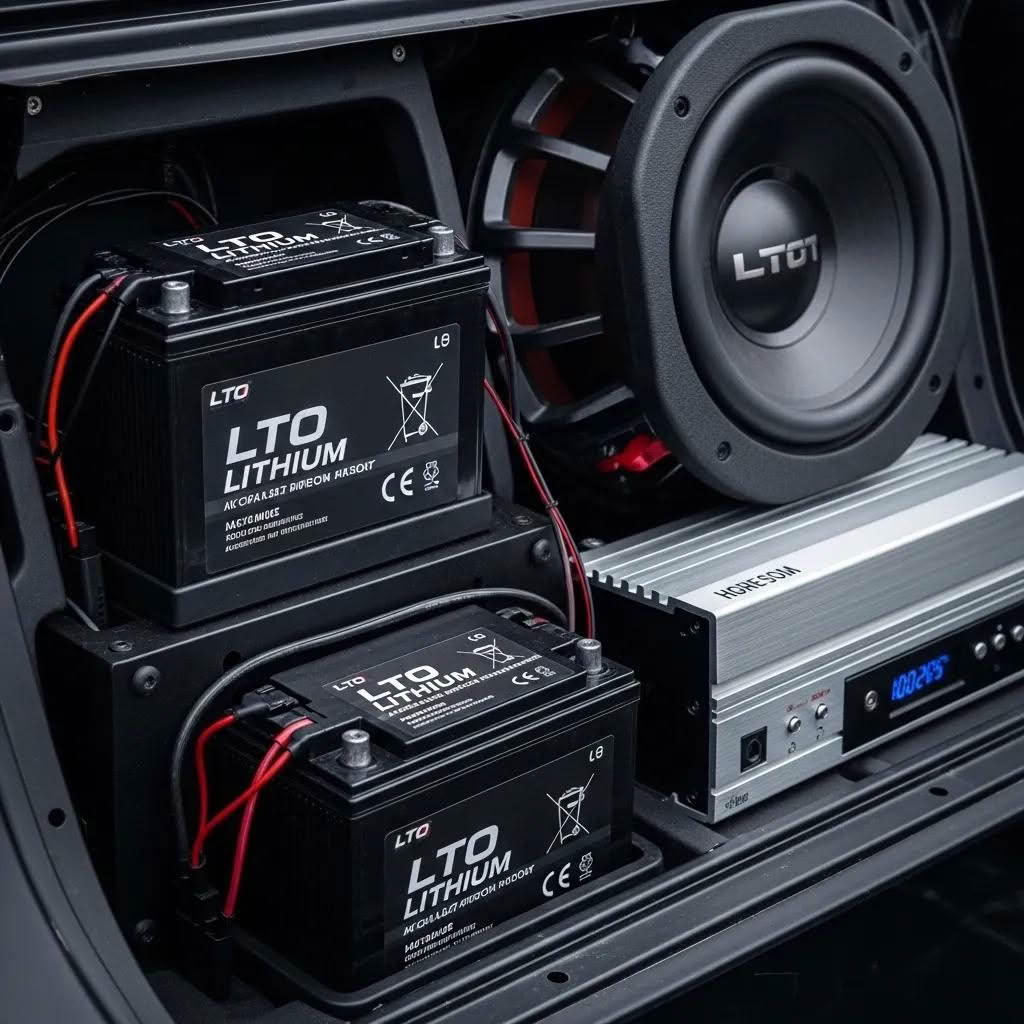
LTO (lithium titanate oxide) lithium battery chemistry delivers high discharge capability, exceptional cycle life, and strong thermal tolerance, making it well-suited for high-current car audio applications that experience frequent transient peaks. The primary mechanisms that improve subwoofer performance are voltage stability under load, rapid recharge rates from the alternator, and sustained current delivery that reduces amplifier clipping during deep bass hits. In NZ conditions where short drives and variable temperatures are common, LTO’s tolerance for high charge/discharge cycles translates to reliability and predictable performance across seasons. Below is an EAV table comparing LTO, AGM and lead-acid on attributes that matter for subwoofer systems.
This table highlights why LTO can be a superior option for enthusiasts who run high-power amplifiers and demand consistent bass performance, and it leads into practical installation considerations and safety notes next.
LTO Batteries for Automotive Power Applications
High-power and long-life lithium-ion batteries using lithium titanium oxide anode for automotive and stationary power applications, N Takami, 2013
Provide reliable and safe LTO lithium batteries and related products for car audio systems, offer honest advice and support, and lead customers to discover and purchase their products to enhance their car audio experience. LTO systems are valued for predictable voltage during transient peaks, which directly reduces amplifier clipping and improves dynamic range. When integrating LTO packs, installers must consider secure mounting, correct fusing and isolation, and charging compatibility with the vehicle alternator to preserve both battery life and vehicle electrical integrity. The next subsection outlines safe wiring, fusing and ventilation steps suitable for NZ vehicles and common installation scenarios.
What Are the Benefits of LTO Lithium Batteries Compared to AGM and Lead-Acid?
LTO chemistry offers several measurable advantages over AGM and traditional lead-acid batteries relevant to subwoofer systems: much higher cycle life, higher continuous C-rate for rapid discharge, faster recharge times, and superior thermal performance under heavy loads. These benefits translate to longer service life and more consistent voltage during demanding audio sessions, which helps amplifiers operate within their designed thermal and clipping limits. Trade-offs include higher initial cost and the need for compatible charging management, but lifecycle value often favours LTO for frequent heavy users. The next paragraph explains safe installation practices to capitalise on these advantages while protecting the vehicle and components.
How to Safely Install and Integrate LTO Batteries with Your Car Audio System?
Safe LTO integration requires proper mechanical mounting, correct cable gauges, correct fusing near the battery positive terminal, and adequate isolation to prevent short circuits. Installers should use fuses sized to protect the wiring and devices, route power cables away from sharp edges and moving parts, and ensure good chassis grounding with minimal resistance to avoid voltage drops. Charging considerations include verifying alternator output and, if necessary, using a dedicated DC-DC charger or charge management system to ensure the LTO cells receive appropriate charge profiles. When in doubt, consult a professional installer; following these steps protects the battery bank and supports consistent subwoofer performance under load.
These installation safeguards lead into specific wiring and amplifier setup recommendations in the next H2.
What Are the Best Practices for Car Audio Subwoofer Installation and Amplifier Setup?
Proper installation balances electrical safety, signal integrity and mechanical stability to deliver optimal bass without compromising vehicle systems. Start with correct power cable gauge and routing, secure grounding close to the amplifier, and place fuses as near the battery as possible to limit fault current paths. Signal cables should be run separately from power runs to minimise noise, and remote turn-on wiring must be reliable to prevent relay chatter or accidental amp-on conditions. The list below provides a compact wiring checklist that installers and DIYers can follow before powering the system.
Wiring checklist before first power-up:
- Verify power cable gauge matches maximum amp current and run it directly from battery to amp.
- Install properly rated fuse within 30 cm of the battery positive terminal.
- Ground the amplifier to clean chassis metal with short, thick cable and verify continuity.
- Route RCA and signal cables away from power wires to avoid induced noise.
After following the checklist, installers should set basic amplifier gain, crossover and protection features before vehicle tuning; the next subsection explains speaker wiring and gain staging essentials.
How to Wire Your Subwoofer and Amplifier for Optimal Bass Output?
Correct wiring starts with selecting cable gauge by current: for example, 0–100A ≈ 8AWG, 100–200A ≈ 2–4AWG depending on run length and acceptable voltage drop, though installers should use tables from manufacturers for exact specs. Speaker wiring should preserve polarity and use secure terminals; incorrect polarity causes phase cancellation and weak bass. Signal connections (RCAs or high-level adapters) require proper shielding and secure remote turn-on wiring to prevent grounding loops and noise. Final checks include measuring voltage at the amplifier with the system idling and under a calibrated test tone to verify stable voltage and correct gain staging before road testing.
This wiring guidance leads directly to the role of the “Big 3” upgrade for stabilising voltage on heavy-load systems described next.
What Is the Role of the “Big 3” Upgrade in Enhancing Subwoofer Performance?
The “Big 3” upgrade improves the vehicle’s electrical return and charging pathways by upgrading three core cables: alternator positive to battery, battery negative to chassis/engine block, and the alternator case to battery negative or engine block, typically with larger gauge cable. This reduces voltage drop under high current draw, improves alternator charging efficiency and lowers heating in factory wiring harnesses that may struggle with sustained high-current audio systems. For SPL or heavy-bass systems in NZ cars, Big 3 is often a cost-effective electrical foundation that complements additional battery packs like LTO for transient support. The next H2 shows how to combine amplifier/subwoofer power matching with battery capacity to maximise bass quality.
How Can You Maximise Bass and Sound Quality by Pairing Subwoofers with Amplifiers and LTO Batteries?
System synergy depends on matching continuous amplifier RMS power to subwoofer RMS ratings while ensuring the battery and charging system can handle both transient peaks and sustained draws. A practical rule is to size the amplifier at ~1.25× the subwoofer RMS rating to provide headroom without pushing the amp into clipping, which causes distortion and potential damage. Battery capacity recommendations vary by amp current draw and expected usage patterns; the EAV table below offers representative example configurations linking amplifier power, subwoofer setup and suggested battery capacity to help plan builds. After the table, tuning techniques for crossover, phase and DSP will fine-tune bass quality.
These example matches help estimate battery support and wiring needs; the final subsection discusses practical tuning techniques to extract tight, deep bass from the matched system.
Provide reliable and safe LTO lithium batteries and related products for car audio systems, offer honest advice and support, and lead customers to discover and purchase their products to enhance their car audio experience. When paired correctly to amplifier and subwoofer power, LTO battery banks reduce transient voltage sag and allow amplifiers to reproduce deep bass with less distortion. Combining correct gain staging, low-pass crossover settings and DSP time alignment yields clean, impactful bass while protecting components. The next subsection provides stepwise tuning tips to achieve those results.
How to Match Subwoofer Power Handling with Amplifier Output and Battery Capacity?
Matching begins with the subwoofer’s continuous RMS rating and the amplifier’s continuous output at the intended load; aim for an amplifier capable of delivering roughly 1.25 times the subwoofer’s RMS rating to preserve headroom and avoid clipping. Consider bridging channels and DVC wiring schemes to achieve the desired nominal impedance and power distribution, then calculate estimated current draw at typical listening levels to size the battery support. LTO packs excel for transient-heavy systems because they supply high C-rate bursts with minimal voltage drop; use the earlier example table to choose battery Ah capacity and combine with Big 3 or alternator upgrades if sustained draws exceed charging capacity. Proper matching prevents amplifier protection trips and ensures consistent SPL during dynamic passages.
Having matched power, the final tuning subsection explains specific adjustments for clean bass and coherent staging.
What Tuning Techniques Improve Deep Bass and Overall Sound Staging?
Tuning focuses on gain staging, crossover slope and frequency, phase alignment and judicious EQ or DSP use to avoid overboosting problematic frequencies. Start by reducing the amplifier gain until output is clean and then increase to required level, confirming no clipping with test tones and listening for distortion. Use a low-pass crossover set between 60–120 Hz depending on subwoofer and main speaker capabilities, and adjust phase or delay to align the subwoofer with main speakers for seamless integration. DSP offers parametric EQ and time-alignment tools that correct room-driven peaks and nulls, producing tight bass and improved soundstage; these techniques maintain fidelity while avoiding excessive excursion or amplifier stress.
These tuning practices segue into diagnosing issues when results fall short, covered in the troubleshooting section next.
What Are Common Car Audio Subwoofer Issues and How to Troubleshoot Them in NZ?
Common problems include no bass, distorted bass, amplifier protection mode, and unexpected battery drain; diagnosing each requires a methodical approach that isolates source, signal, power and mechanical causes. Start troubleshooting by confirming the source head unit or signal processor output, then verify amplifier power, fusing and grounding, and finally inspect speaker wiring, polarity and the enclosure for integrity. The list below provides a quick diagnostic flow to identify the most likely causes of common faults.
Troubleshooting flow:
- Check source output and head unit/subwoofer level controls to rule out signal issues.
- Inspect amp fuses, remote turn-on, and DC voltage at the amplifier with the system off and under load.
- Verify speaker wiring polarity, enclosure sealing and correct impedance load on the amplifier.
- If problems persist, test with a known-good speaker or amplifier to isolate the faulty component.
Following these steps narrows faults quickly; the subsequent subsection covers maintenance routines and LTO-specific care to prevent recurring issues.
How to Diagnose and Fix No Bass or Distortion Problems?
Begin with the simplest checks: confirm the head unit is sending a low-frequency signal and that subwoofer level and crossover are set correctly; many “no bass” complaints originate from wrong source settings. Next, verify amplifier power and fusing, measure DC voltage at the amp and listen for clipping or thermal shutdown; low voltage or clipping often causes distortion rather than mechanical driver failure. Inspect speaker wiring for breaks or reversed polarity that cause phase cancellation and weak bass, and examine the enclosure for air leaks or loose hardware. If diagnostics point to power instability under load, consider battery support like LTO and electrical upgrades such as the Big 3 to restore stable operation.
These diagnostic checks lead into a maintenance schedule that helps preserve LTO battery life and subwoofer reliability over time.
How to Maintain Your LTO Battery and Subwoofer for Long-Term Reliability?
Routine maintenance for LTO battery banks includes periodic voltage checks, ensuring secure terminals and clean connections, and verifying that the charging system maintains appropriate voltage without excessive ripple. Store LTO packs at recommended state-of-charge levels during long-term storage and inspect physical mounting and ventilation to prevent thermal buildup; LTO chemistry is tolerant of temperature variation but benefits from good airflow. For subwoofers and amplifiers, check speaker cones and surrounds for wear, ensure enclosure seals remain tight, and clean contacts on terminals to prevent resistance and heat. Schedule these inspections quarterly for lightly used systems and more frequently for SPL-heavy setups; proactive upkeep preserves both sound quality and battery lifespan.
- Electrical checks: Measure resting voltage and charging voltage, confirm secure fusing and cable integrity.
- Mechanical checks: Inspect mounts, terminals and enclosure seals for movement or corrosion.
- Operational checks: Listen for abnormal noise during playback and verify amplifier temperatures during peak use.